

Building my custom poker table
Building a custom sized oak and walnut poker table was a project that I was eagerly awaiting. The table was to be located in the new bar room and I wanted it to be a large enough table that eight guys could fit around it and have plenty of room to play and not be crowded by one another. Eight sides was one side more than necessary since a maximum of seven players can play many poker games utilizing only one deck of cards.
I got the idea for the style of the table from David Tiell from
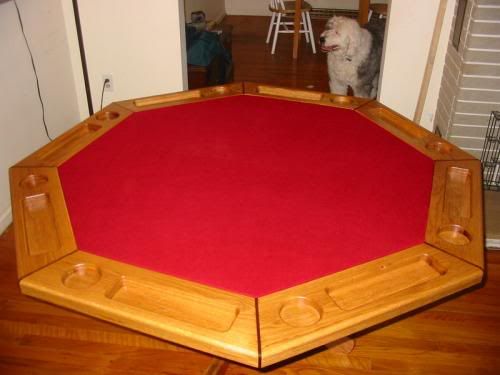
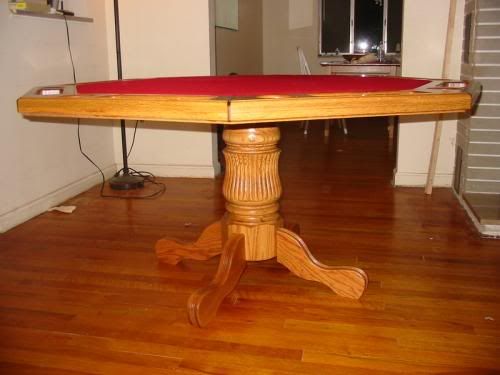
Before getting on with this piece, for comparison's sake, here are two pictures of Dave's version of a poker table.
Now, there are a number of people who will be taking a look at this photo essay and not all of them will be woodworkers, so with respect to my fellow woodworkers, please forgive me if some of the essay sounds and looks a bit elementary.
The first detail needed to be taken care of was to determine the size that my table needed to be. I didn't want to make any of the structural elements of the table out of multiple pieces of wood since one single piece would be stronger than two or more pieces glued together would be. This need called for plywood to be called into service. Now, most plywood comes in four foot wide sheets. This limitation made for a table that would be a bit smaller than I cared for. However, Baltic Birch plywood comes in five foot square sheets and that was the key to getting what I wanted as far as the construction of the table went.
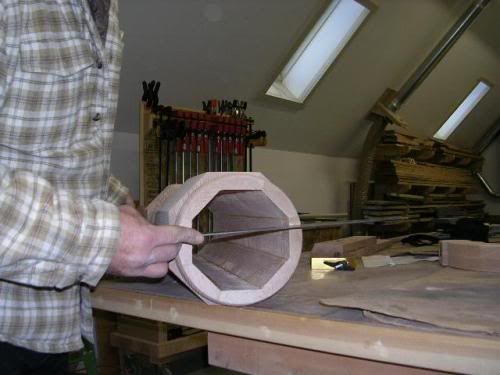
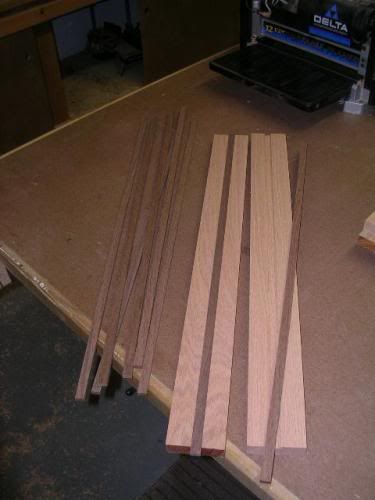
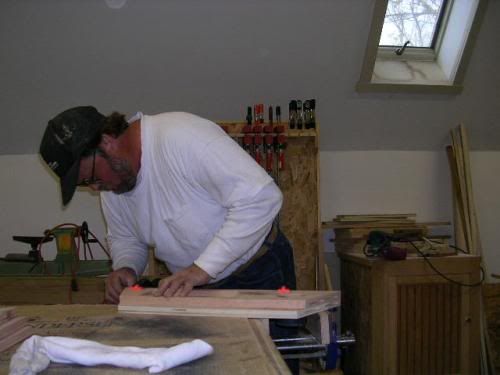
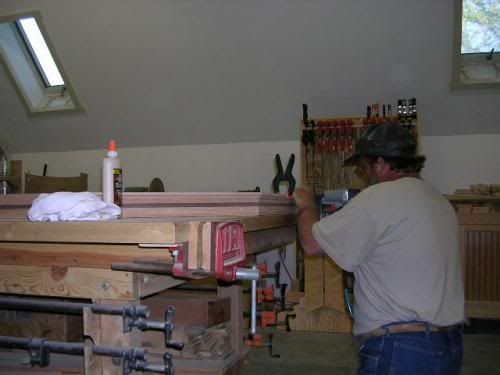
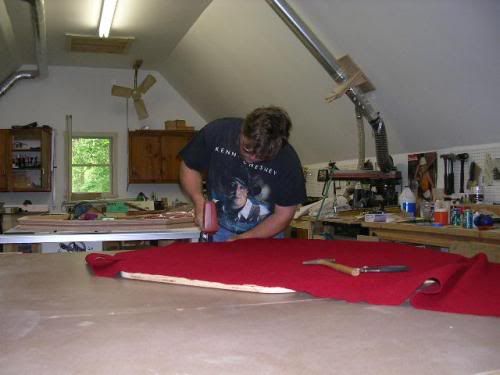
Below, I am shown in the starting stages of getting the size of the outside segments of the eight sided playing surface determined - using cardboard in a cut - measure and fit method until I had the size determined. In the end, the widest (outside) dimension of each segment came to near
two feet long.
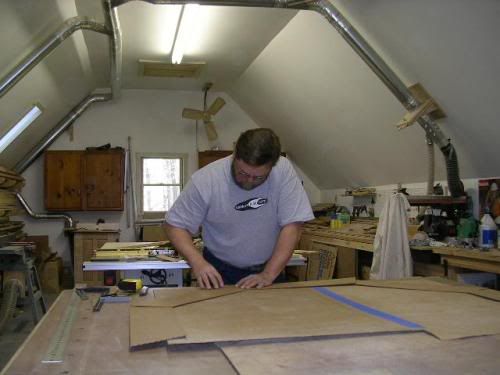
I used other cardboard to simulate the size that I wanted the tabletop to be. When I got the segments cut down to the proper size and they matched the layout, I had my segment size.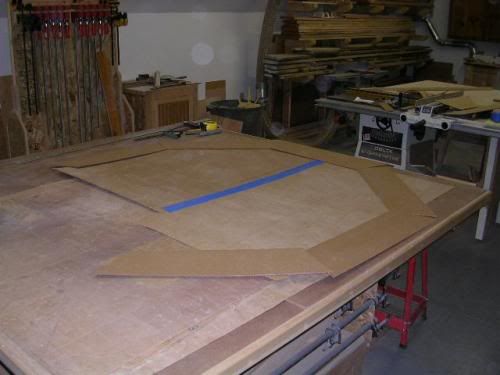
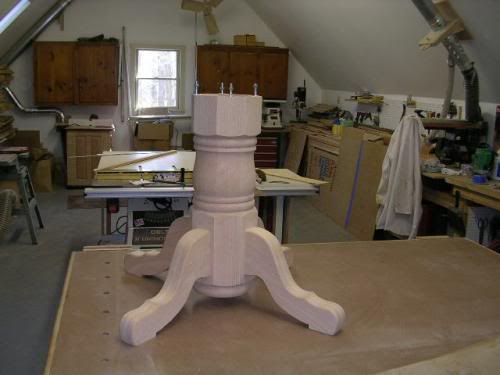
I had had the leg set and the pedestal assembly sitting around the shop for quite a while. It was quick work to drill the holes for mounting the legs to the pedestal. First though, I wanted to make sure that the pedestal was square or else my hole layout for the leg bolts would be off.
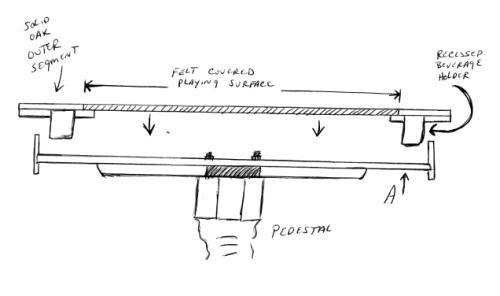
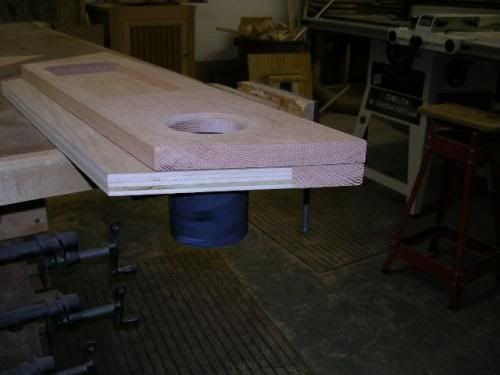
The perimeter of the top playing surface was going to be comprised of two ¾" layers of wood laminated together to make a 1 ½" thick tabletop. The reason for this can be better described by a quick sketch I did. In the below sketch, you can see that the playing surface is two layers of wood laminated together. The bottom layer extends into the middle region of the table further than the top layer. That is to allow the actual felt covered playing surface to rest on the "lip" that is provided by the extension of the bottom layer of wood lamination. Further complicating the laminating process is the fact that I will be laminating a deep well beverage holder between the two laminations of wood. This beverage holder will fully prevent a can of soda or beer from accidentally being knocked over onto the table. It will also provide a good hold on beer cups. Many tables that I have seen provide only a small indentation on their tables for holding cans or cups - nowhere near deep enough to insure spill protection.
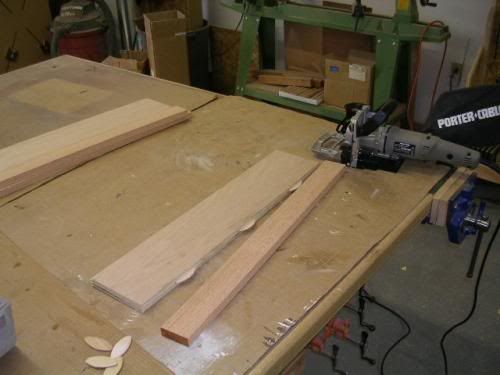
Being that only the outer edge of the bottom lamination was going to be seen, I had the option of using minimal actual solid wood in the construction of this layer. I had plenty of scrap oak plywood left over from the bar room construction and this was a perfect use for it. The picture below shows the method of edge-gluing a small strip of solid oak to a wider strip of oak plywood using biscuits.
With the bottom lamination glued and drying, I moved to fabricating the solid oak top lamination segments. That entailed making the first jig for the job. This jig conformed to the 22 ½ degree angled ends of the sections. The jig acted as a stop block to ensure that all of the pieces were cut at the very same length. This is critical to having the eight segments all go together and match up at all of the seams. It was a simple jig to complete and it securely bolted to my Incra 2000 miter jig fence. I needed to keep this setting for cutting the bottom lamination also before it was lost. All sixteen pieces needed to be exact!
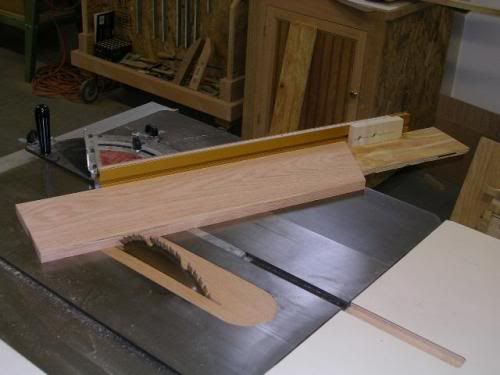
A quick dry-fit with my Bessey web clamp resulted in tight fitting joints.
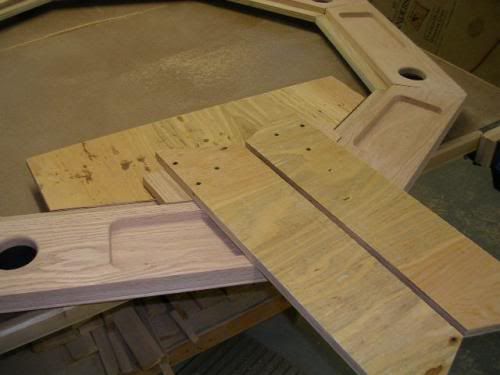
Each of the eight segments would have the hole to accommodate the beverage holders and they would each also have a recess routed into them for each player to locate their change/poker chips. That called for the second jig to be built. One of the former cardboard segment pieces was useful for laying those details out and transferring them onto the MDF based jig.
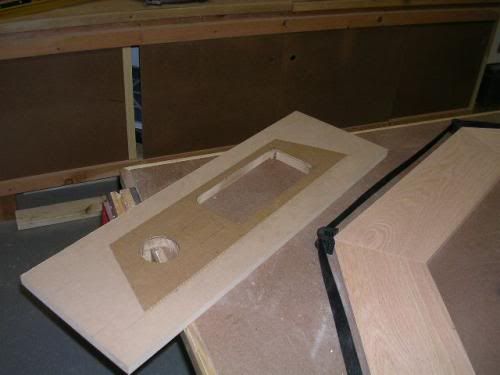
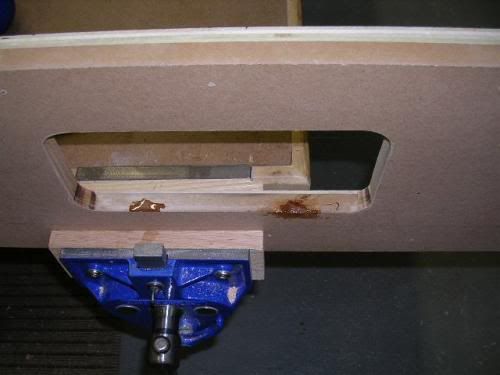
The jig would have to securely hold the segments in place while the two routing operations take place. This is detailed with an underneath look at the jig in the pic below.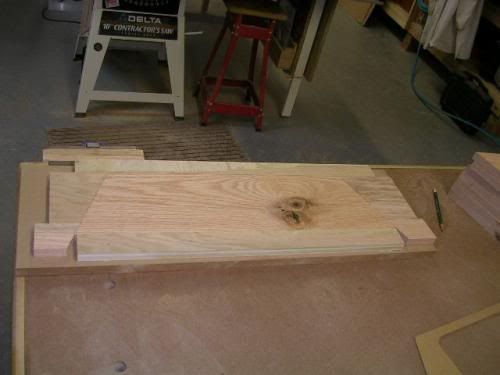
Below is how the jig looked from the working side with a segment inserted into it.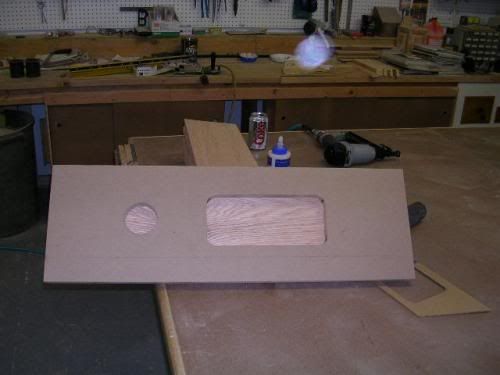
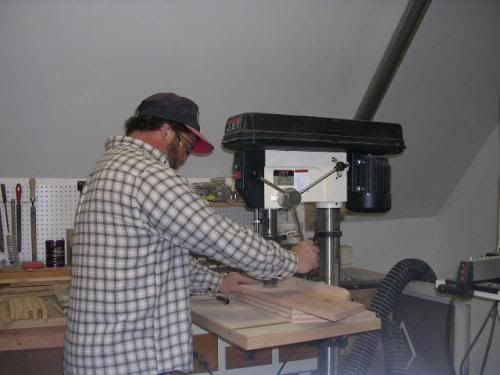
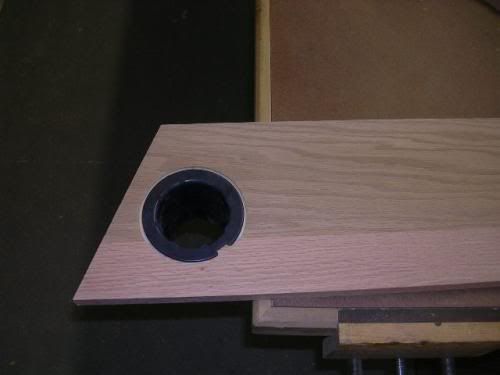
The round hole for the beverage holder would be routed out using a flush cutting bit. That meant that I had to "hog out" most of the wood first using a 1 ¾" hole saw in my drill press and then cutting out near the circumference with a saber saw and leaving a minimal amount to route with the bit.
Being that my flush cutting bit is a "bottom bearing" style, I actually needed to route the holes with the jig face down. No problem though. The scraps holding the segment in place were the same thickness and they provided a nice support for the router base.
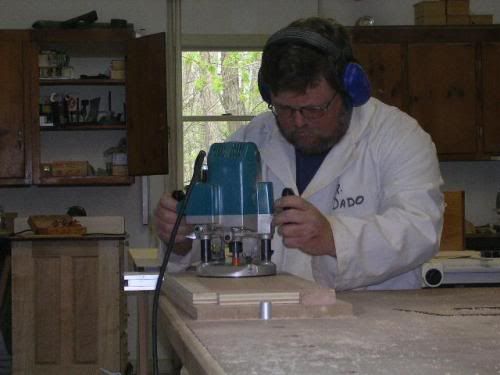
To route out the recess for the change and poker chips, it meant flipping the jig over and using a ¼" up-cutting spiral bit. This helped in making a smooth bottom to the recess and helped in clearing the resulting debris. The base plate on my router was not wide enough to ensure that it wouldn't slip into the recess and gouge out the wood deeper than I needed. I had to fab up a wider plate for this purpose and ¼" luan ply scrap that was lying around fit the bill.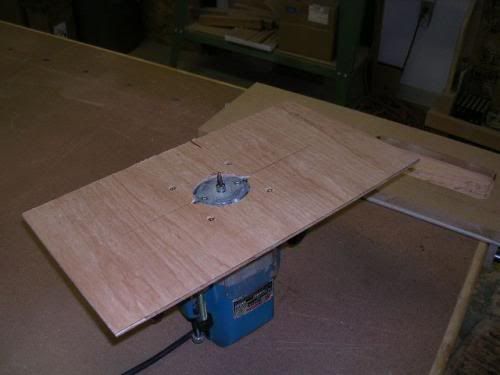
In a moment of not paying attention, I nicked the side of my jig when I was raising the router out of the jig and it needed to be repaired since the nick would cause the router to transfer the mistake to the recess that I was routing out. Some five minute epoxy came to my rescue.
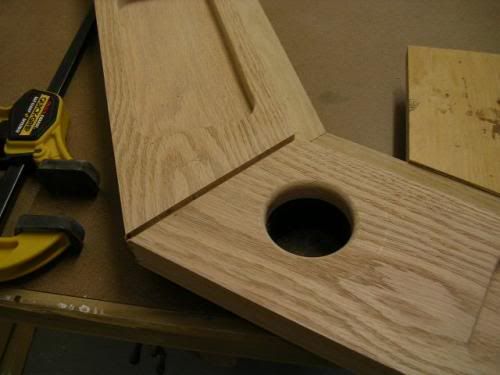
While the epoxy set up, I began to do some of the initial sanding of the segments. It was beginning to look like something!
A rabbiting bit made quick work of adding a recess that the plastic beverage holder insert would sit in-between the two laminations.
While I investigated just how I was going to add a bottom to the plastic beverage/can holders, I decided to move on and begin to fabricate the part of the table that would support the playing surface. Concise measuring and figuring needed to be done before marking out the 5 foot square sheet of Baltic birch plywood. I didn't need to make a mistake laying this out as this is a $61 sheet of plywood and I didn't want to have to buy another one. The depth of the slight reveal around the perimeter of the playing surface - the thickness of the small trim that would trim out the bottom of the playing surface and the remaining stock after the dado was milled into the apron pieces all needed to be figured into the equation to finally figure out the full width of the eight sided plywood piece. As it turned out, the piece needed to be 2 ¾" less in diameter that the overall width of the playing surface. I turned back to my original cardboard segment pieces and trimmed 1 3/8" from the outside of the segment and used that to check the layout on the plywood. It checked and I was good to go. I can't stress enough the need to check and recheck your figures before cutting. Once it's cut, it's a done deal.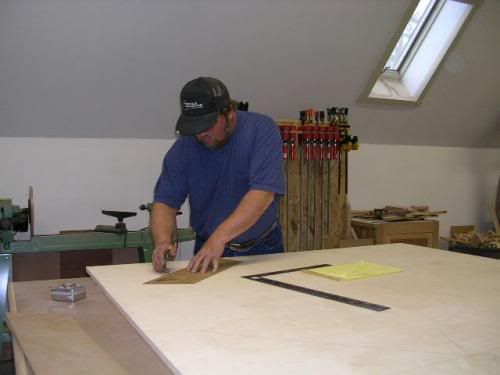
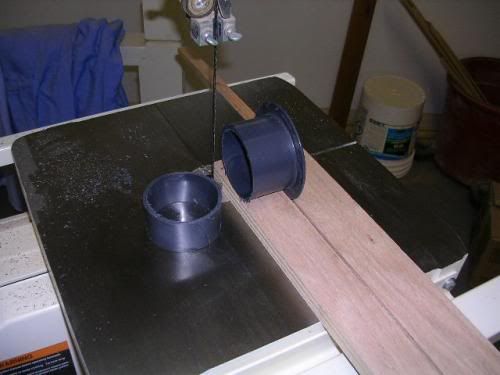
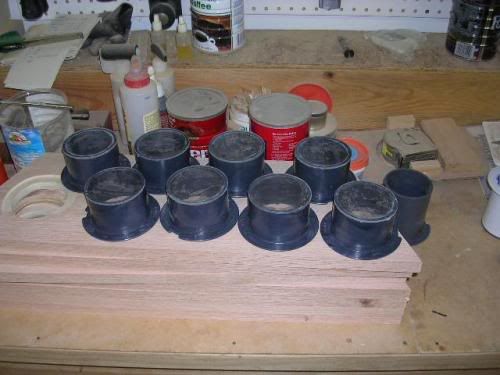
After some experimentation, I found that I could easily cut and fabricate the holder bottoms from Lexan. Cutting was done on the bandsaw and final sizing was accomplished at a disk sander mounted on my lathe. A simple jig was used to cut the holders down to the depth that I needed and then a special Super Glue for plastics was utilized and the bottoms were secured permanently!
The aprons were up next and it was quick work to milling them to size and then it was adding the decorative touches. I had thought about adding flutes to the outside of the aprons, but decided to go with a walnut band of inlay around the outside instead and that would go nice with the minor walnut inlay that would be inlaid at each intersection of the top segments later in the construction phase.
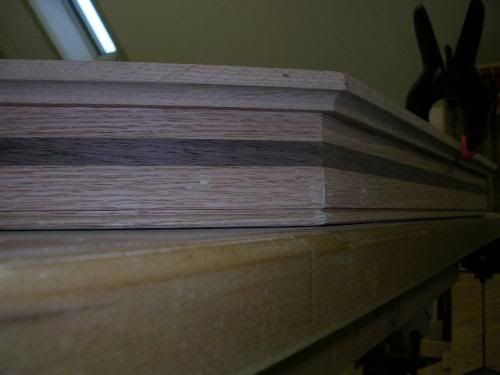
The inlaid walnut was set proud of the oak surface and when dry, it was a simple manner of planing the stock down to make the walnut flush with the entire surface. The planing took the stock down to the final ¾" thickness. I wanted to put a nice bead detail along the bottom of the playing surface and also along the bottom of the apron. This would be much easier to accomplish at the router table before everything was put together - than later with the handheld router!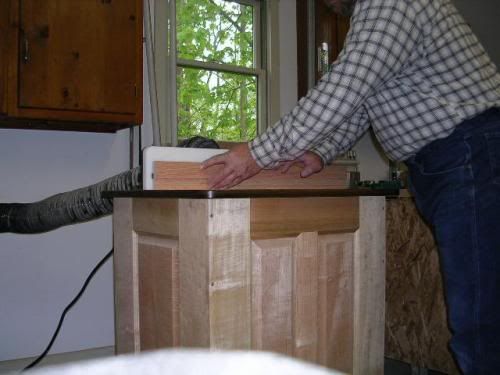
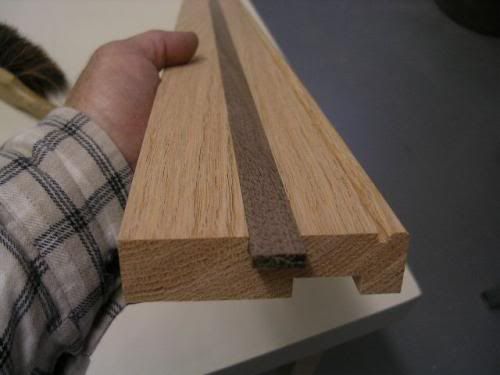
And here below is one of the aprons showing the beading along the bottom edge. The dado milled into the inside of the apron is also evident.
With the milling of the apron pieces complete, it was on to fitting them to the table subassembly. I would have liked to turn back to one of the earlier jigs for ensuring consistent length cuts, but I'm not Norm Abram and any slightest bit difference in length of the eight sides of the Baltic Birch plywood would result in poorly matched up joints. That meant measuring each individual apron mounting and cutting it to size. That didn't take long and I wrapped up this particular day with gluing up the apron to the Baltic Birch ply. Things were finally beginning to take shape.

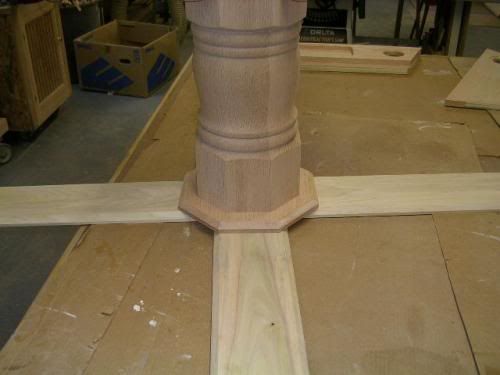
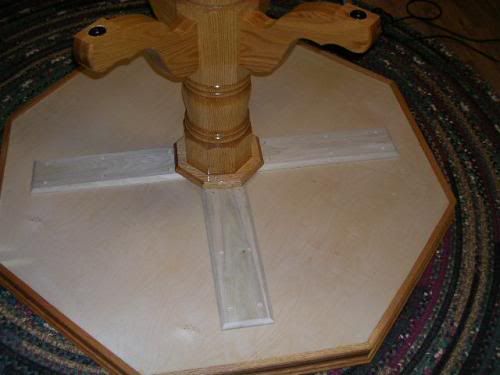
Of course, you need something to support that large structure. That is where the pedestal and its associated assemblies is brought into the picture. The mounting screws let into the top of the pedestal assembly were extended about 1 ½" out of the top. I compensated for this with two pieces of support. I started with an 11" octagonal piece of oak and then some long wide pieces of poplar, half-lapped at the center to form a cross-buck for supporting the underside of the table.
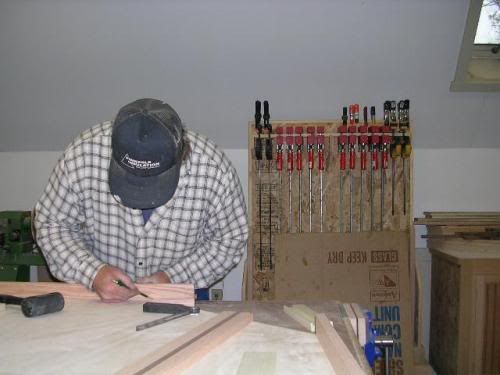
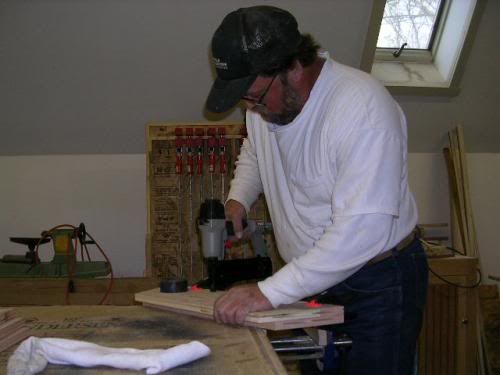
Some of the final gluing up had to do with the eight segments that made up the perimeter of the actual playing surface. You"ll recall that they were comprised of two ¾" laminations of a solid oak and a solid oak/plywood layer with the cup/can holder fitted in-between. Below I'm gluing a section together and holding it with clamps..
..and when the laminations are perfectly lined up they are tacked with some small gauge nails from the underside and afterward clamped wherever needed and set aside to dry.
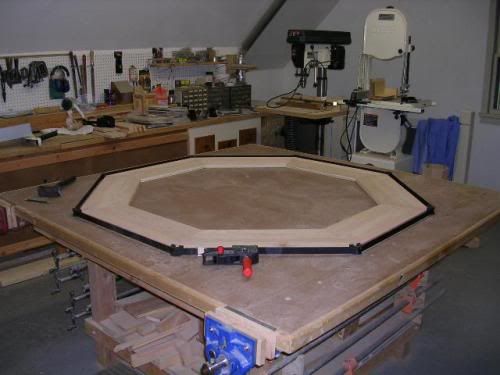
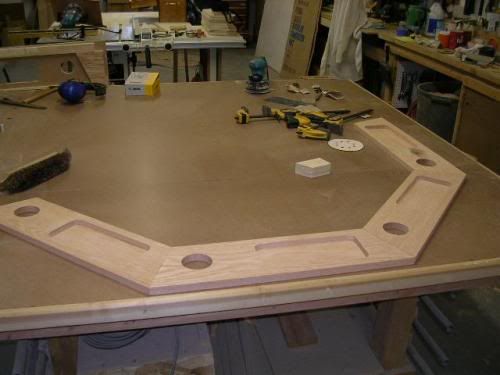
I hired on the help of my lovely wife Karen to help me with the webclamping of the entire oak perimeter and once the glue was dry and it was now one solid unit, it was on to routing in the recesses between each segment for the walnut inlay that was to follow. This required yet another jig. You know, you would think that this poker table is one project, but when you think about it, it has entailed a number of smaller projects in that a handful of jigs needed to be fabricated to aid in certain aspects of building the table - so in effect, it has been a number of projects. The jig needed for the next stage was a simple one to build - took about a half hour to fabricate, but once it was done, I completed the routing task in about twenty minutes and all were a perfect match to one another.
As you can see below, the jig has an alley down the middle of it which coincides with the middle of the joints of each segment. The width of the alley was 7/16 and that coincided with the width of the guide bushing that was mounted onto my router in which to house the ¼ upcut spiral cutting bit.
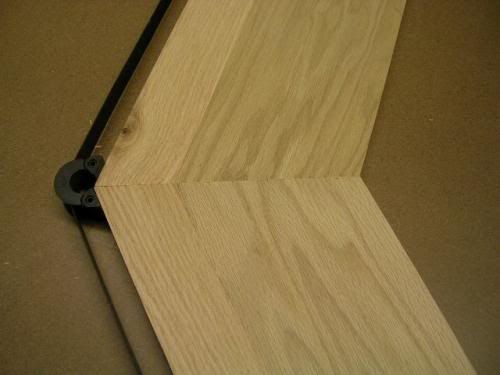
Clamped to the tabletop, the jig allowed the router to simply be pulled through the tabletop's surface and the result was a nice, crisp ¼" recess cut right down the middle of the joint.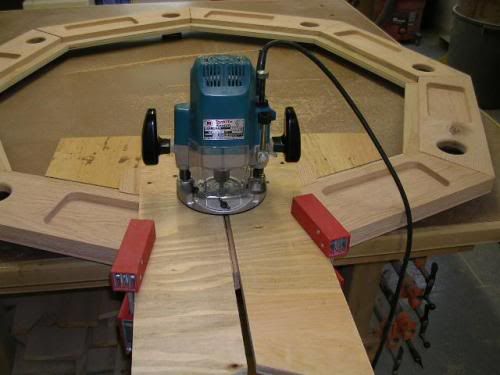
The walnut inlay was applied and when dry, sanded down flush with the playing surface and then the final milling was done which included a slight "round-over" of the inner edge and a nice chamfer of the outer edge. Some final sanding was pretty much all that needed to be done to this particular piece before the finish was to be applied.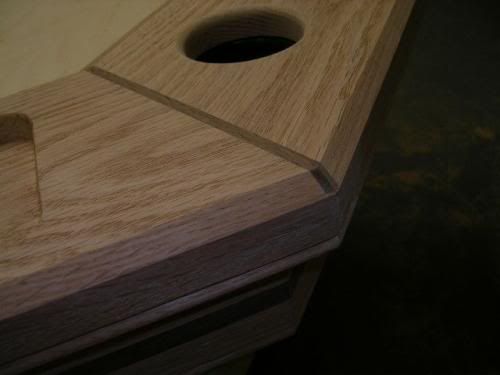
I fabbed up some cove-style trim to dress up the aprons. This would dress out the underside of the tabletop and give it a nice appearance.
Some final sanding of the three pieces making up the table and a general "going-over" led to the final step before applying the finish. A half sheet of ¾" plywood provided the substrate for attaching the felt playing surface to. I had ordered the exact felt that was used on my pool table so that the pieces of furniture would match. I wanted to use something under this felt though, to provide just a little more softness to the playing surface. I ended up using some cheaper, off the shelf felt for an underlayment. I had originally wanted to wrap this underlayment around the edges of the plywood, but I had cut the plywood to a closer tolerance than would allow that, so I trimmed it even with the top edge of the ply.
With the base felt in place, the good stuff was stapled and stretched onto the playing surface and wrapped around to the bottom of the plywood and neatly stapled in place.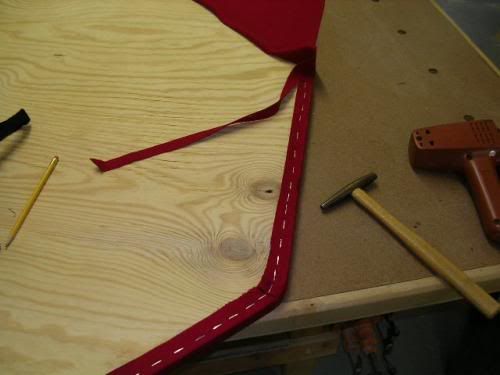
After the step of applying the finish ( Waterlox tung oil Marine sealer and high gloss finish for those in the know) it was on to the final steps before enjoying the first game of poker. The pieces were moved into the bar room and the pedestal assembly was turned over onto the bottom of the tabletop subsurface and attached using square drive screws from the McFeeleys catalog.
The felt covered playing surface was then attached to the oak and walnut inlay tabletop surround, again using square drive scews from McFeeleys. These screws are head and shoulders above anything you can buy from any of the "big box" places!

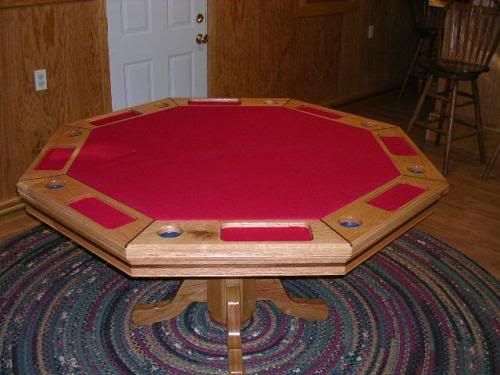
And finally, it was the moment of truth! The playing surface was set atop the table assembly and wow - it looked great. I had enough felt left over from the pool table job, as well as covering the poker table surface, to cut out pieces to place into the eight coin/chip recesses around the playing surface and that really added to the finished look I think. All that we need to do now is find some suitable chairs to place around the table. Man, has this been a satisfying project! It has to rank right up there as one of my proudest achievements.
posted by Fred @ 5:34 PM
![]()
2 Comments:
I was very pleased to find this site. blackjacktournamentsguru
Really nice blog post. Anyone looking for Custom poker or multi game table may also follow : Multi Game Table
Post a Comment
<< Home