
The bar room construction project
I have been wondering when I would get around to posting a complete photo essay of the building process of the bar room. Well, it's a Friday night and I have a few hours to kill. Why not get the job done. I began this project in the early Spring of 2004. It has been eleven months since its inception and it is pretty much complete with the exception of just a few small items.
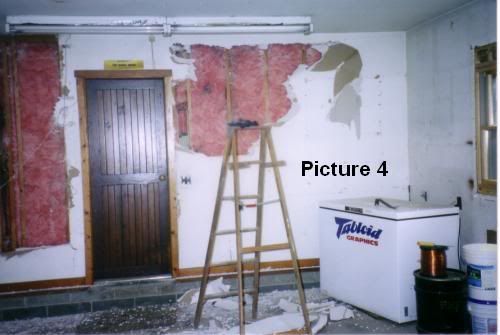
Of course, any renovation starts with ripping out all of the "old stuff". The two pictures below are a handful that I took to document the beginning of the project. Drywall removal was a messy and boring job. Still, the project was now underway and the excitement of the job ahead of me kept me pushing along.

Once the drywall was completely removed from the walls (the cieling drywall remained in place since it was in good shape and would make a good base for the new cieling lathe to be mounted to) - it was on to leveling up the floor. I contemplated not leveling up the floor and that would mean that the difference in the floor height from the back of the room to the front of the room (five inches of difference!) would have to be dealt with in every step of the way. I am so glad that a woodworking buddy of mine convinced me to do it.
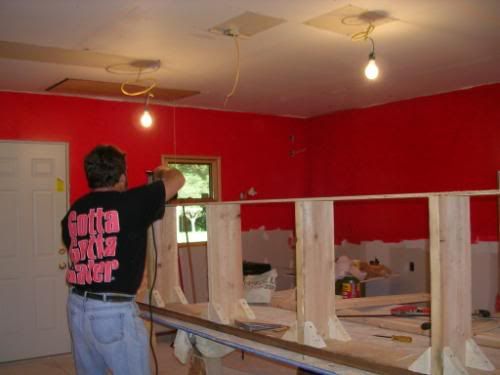
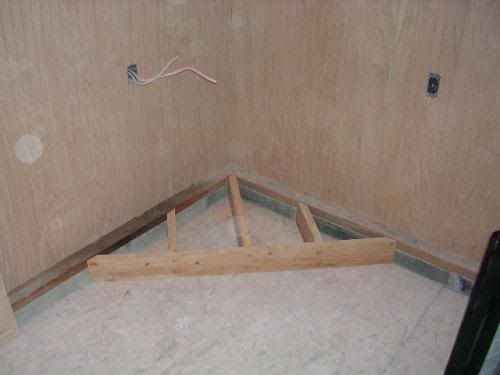
That meant that I needed some way to get measurements for each and every floor joist that would be laid on the floor. I came up with the idea to string the room from side to side and from front to back - using a set up that the picture below demonstrates.
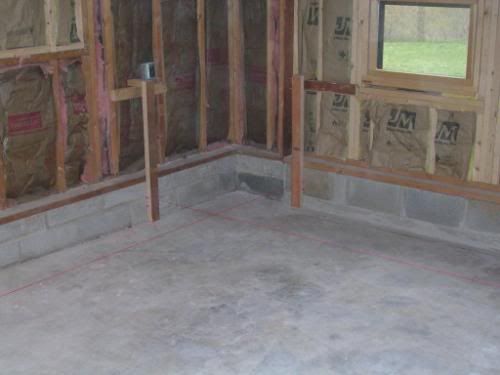
The strings gave me a handful of needed and important information. Across the room from side to side, it allowed me to measure in a number of places and make sure that the slant of the floor was consistent across the room in various locations. Fortunately, it was and this made for much less work. The strings from the back of the room to the front gave me the width needed for each individual joist from the elevation where the tops of the joists were going to be located to the high side of the angled bottoms. The bottoms needed to be angled to match the pitch of the floor. The angle worked out to be roughly two or three degrees, I don't exactly remember now, but it was a necessary bit of information so that when cut at this angle, the joist would sit on the floor and be plumb. The floor turned out to be lots of work, but in the long run, it was worth getting a level floor!
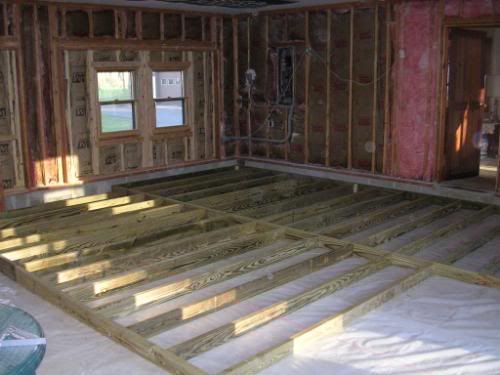
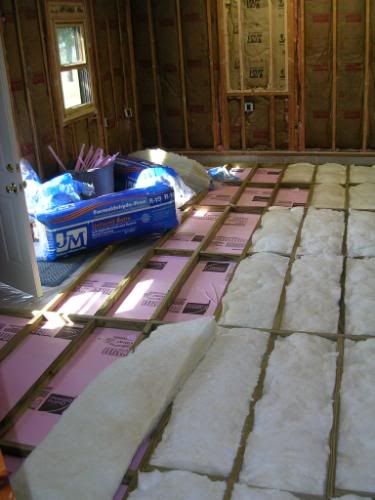
Once I had my measurements, it was plenty of back and forth trips from the room to the woodshop to rip the joists to their proper sizes. Once all joists were installed over the vapor barrier, the insulation in the form of foam boards and batt insulation was placed in all of the cavities. This floor was going to be warm.
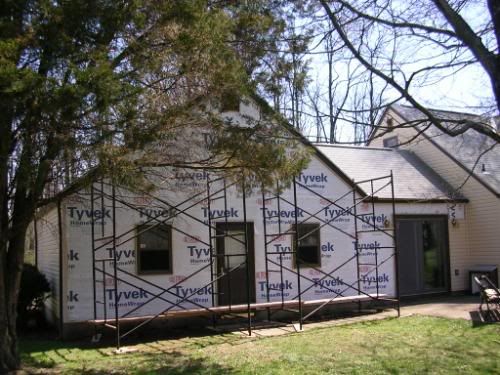
Leveling off the floor meant lots of work. Because the floor was raised, it meant that the back door to the room needed to be raised also. Because the door was going to be raised, that meant that the siding on the back of the house in the area of the room needed to come down for that work. Yeah, as I said, the floor leveling added a nice amount of work!
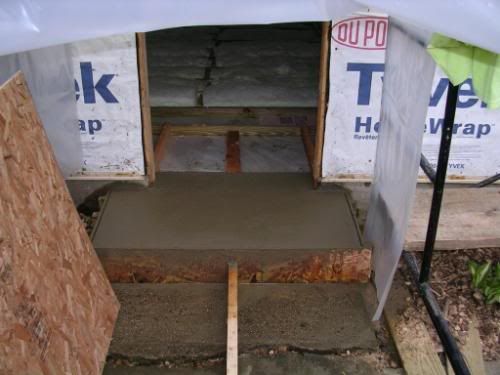
Because the floor and door were raised, I now needed a step to be added below the door to facilitate stepping in the door. Below is the step after it was poured and setting up.
Well, after the siding was back up on the house, it was back into the room and the subfloor was laid. I chose to use tongue and groove sheathing for the added strength that it would supply. This stuff was HEAVY!

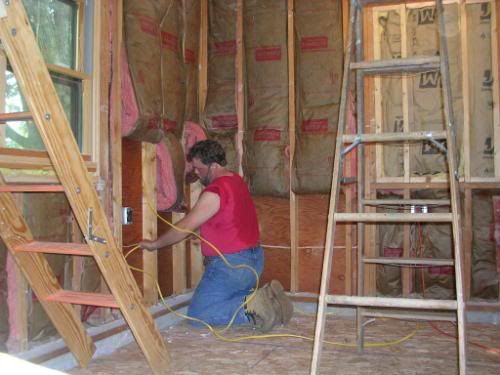
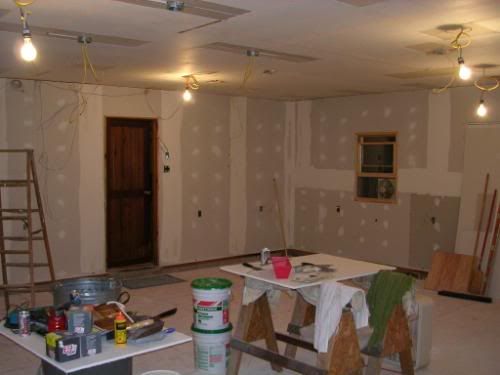
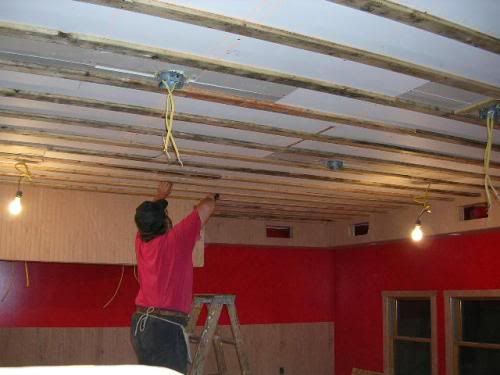
PHEW, I was sure glad that the floor was laid and I could move on with the project! First up was running all of the needed additional electrical wiring. I needed to add receptacles to bring the room up to current code. Also, I needed to run wiring in the cieling for the new lighting, the cieling fan and the air cleaner as well as planning the wiring routes for the television location.
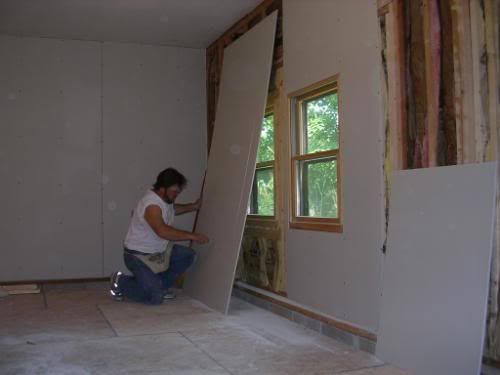
Probably the worst part of the job - the drywall and spackling. I had had enough of that crap when I did the detached garage. That job had 120 sheets of drywall and I didn't want to deal with any more. This room though was not that bad since it was mostly full pieces and easy cut outs for windows and doors.
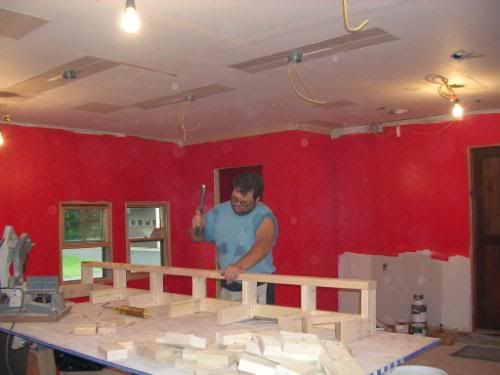
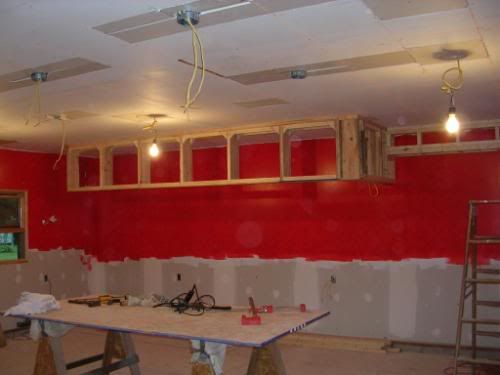
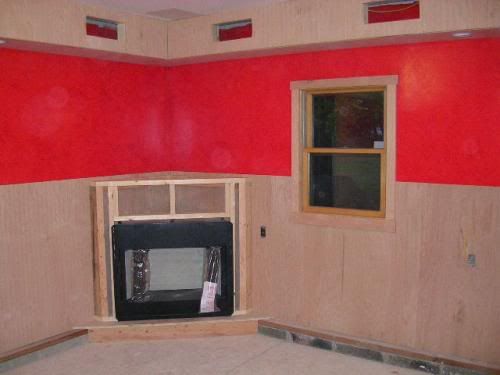
Below, as you can see, the cieling wiring is roughed in and myself and Karen have also gotten to faux painting the walls. That was an interesting experience! We initially wanted to "rag" the walls. We didn't immediately have much luck with that technique on practice boards and we went with "sponging" instead. This turned out to be the trick. In this technique, you first lay down a solid base coat of color and in our case, that meant a bright - very bright - coat of red paint. We actually thought we were in trouble due to the extreme brightness of the base coat. That all changed when we did the sponging and the darker highlights that we sponged on brought the intensity way down and it actually turned out to be a beautiful job if I have to say so myself! The result, though it doesn't show well in the photo, is that the walls take on a red leather kind of look.
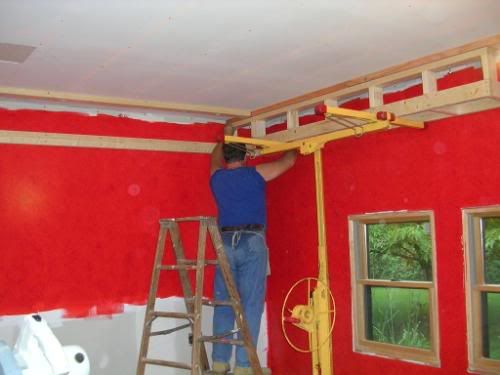
Anyway, with the walls painted, it was time to get around to building some actual structure for the room. I am starting to fabricate the soffit carcasses above. In the picture below, I am mounting the first one up in place. The drywall lift was a brilliant idea for lifting them in place. It made for easy work! Man, worth every penny of the rental fee!
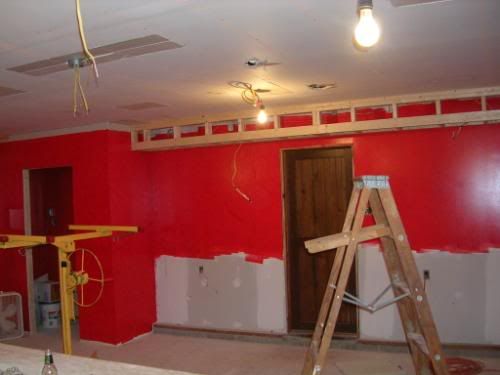
This is the soffit structure (below) located above the door to our existing breezeway/family room. In the left side of the photo, you can see the closet I built into that corner of the room. This closet serves to hide the electrical panel and will provide some storage space for whatever.
Once all of the soffit structure was up and mounted in place, it was on to building the valance that would be mounted above where the bar would be. I needed to do lots of advance planning and measuring ahead of time because when this was mounted on the cieling (seriously lag screwed into the cieling joists) it would need to be centered over where the bar was going to eventually be located. Measurements and planning were critical for this item, as they were for many other items in the room!
And here is the valance carcasse - below - mounted on the cieling.
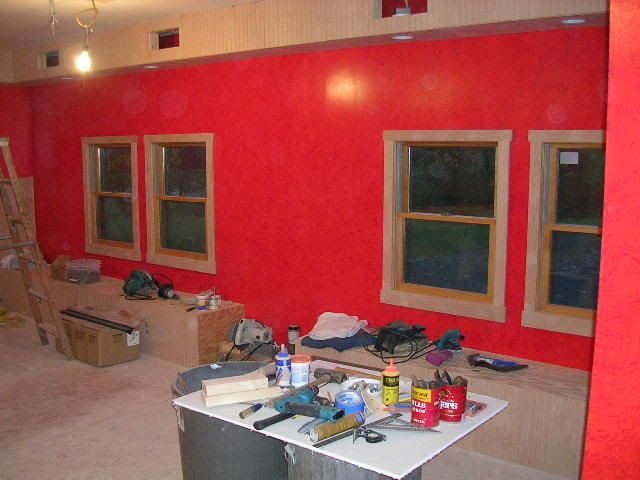
The window seating areas were next to be built and after they were completed, everything was skinned with quarter inch oak beadboard panels. You will notice that there is a gap between the two seat structures. That is because I planned on adding a big bookcase in between the two seating areas. That was going to be built in my shop.
And here is the bookcase up in the shop after I completed it. It still needed to have the crown moulding added, but that was done after it was in place so that it had that "built in" look. At this point, I had yet to build the shelving for the unit.

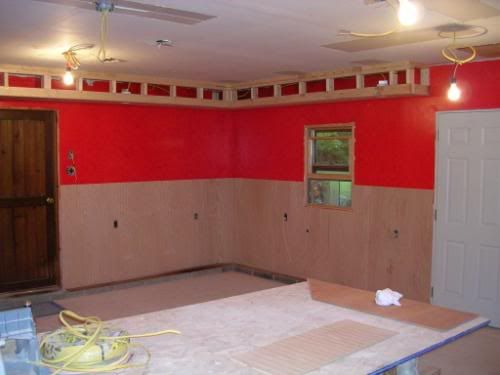
I had purchase plenty of quarter inch oak beadboard panels. Over thirty 4X8 sheets in all since it was covering the soffits, the window seating, the wainscoting (below) and eventually the body of the bar.
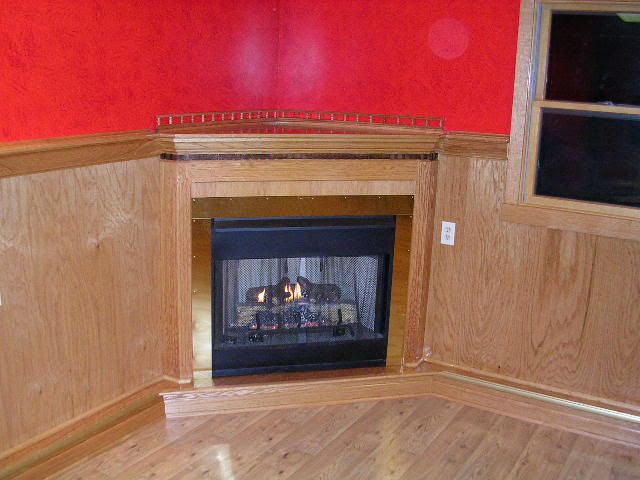
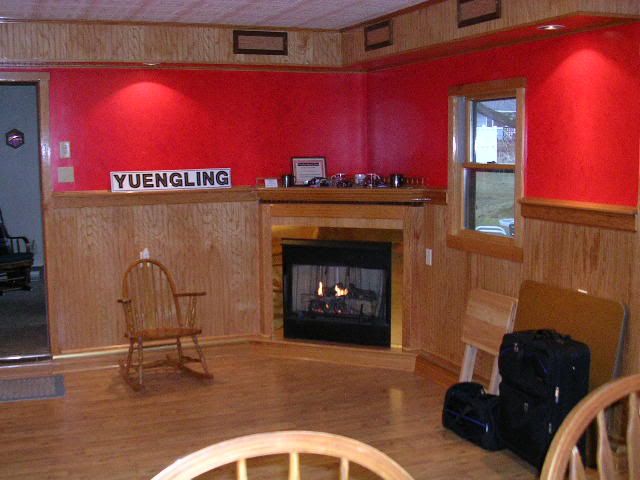
This is the base of the fireplace corner unit. I purchased a propane ventless unit and it was zero clearance and that made for a compact unit and installation. The receptacle with the wiring sticking out is not currently used. I added this particular box for any future considerations, should I want to add an electric blower to the fireplace. This box is covered by a blank cover and is hidden inside the fireplace cabinet.
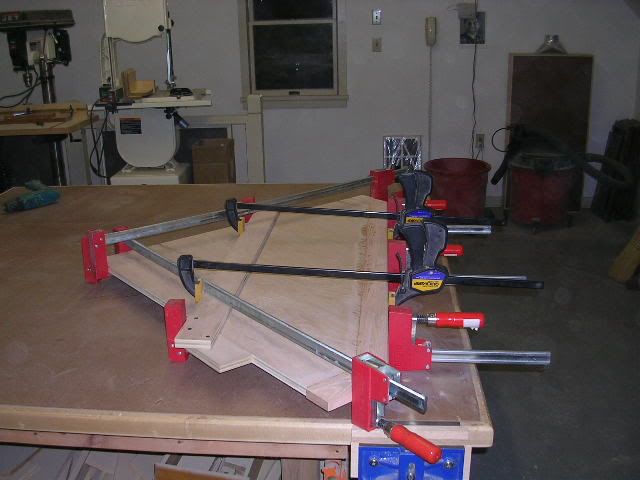
The cabinet framework is complete and for now, that was all that could be done. Meanwhile, up in the workshop, I busied myself with fabricating the top for the cabinet. Obviously, clamping was critical.
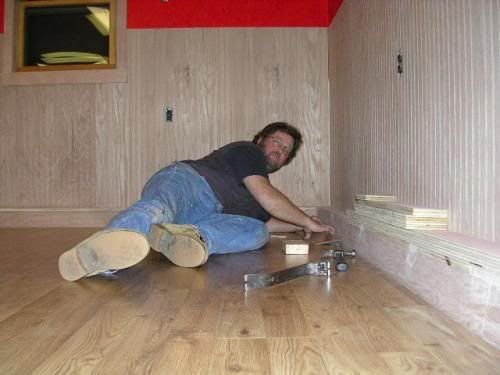
I am pictured below installing the final Pergo flooring piece. The floor was pretty easy to install. AND it made a major difference in how the room appeared. At this point, the room was really beginning to take shape. You can notice that I have also wrapped what had remained of the concrete block foundation with 3/4" oak plywood. This was a nice touch that really added to the room. I would later wrap the exposed corner with a brass looking moulding.
Along with the floor, the addition of the Armstrong architectural cieling really brought the project along in the looks department. But first, a ton of work needed to be done in preparation for the cieling tiles. I needed to nail up 1x3 lathe at twelve inch centers so that it provided somewhere to staple the cieling tile flanges into. Boy this was some tough work since it was overhead work and made for tired arms. I'm not the spring chicken that I used to be.
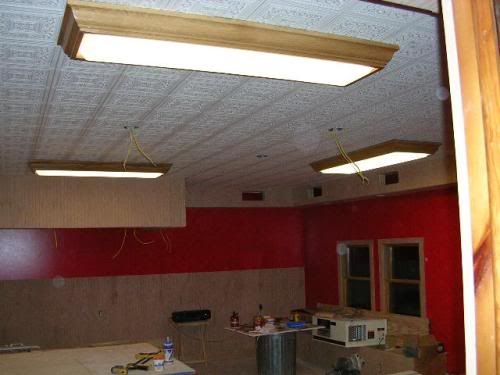
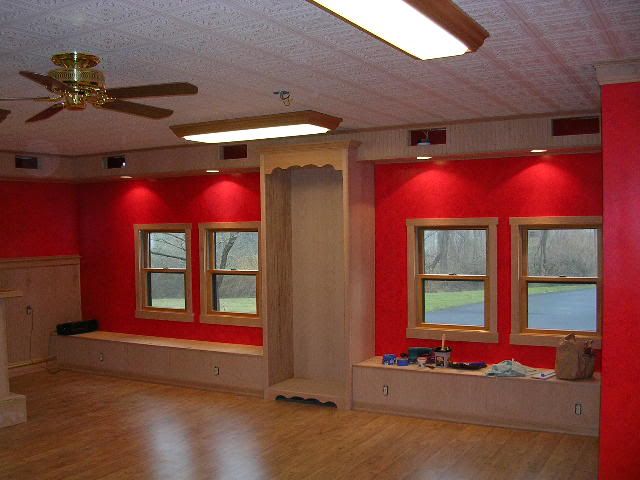
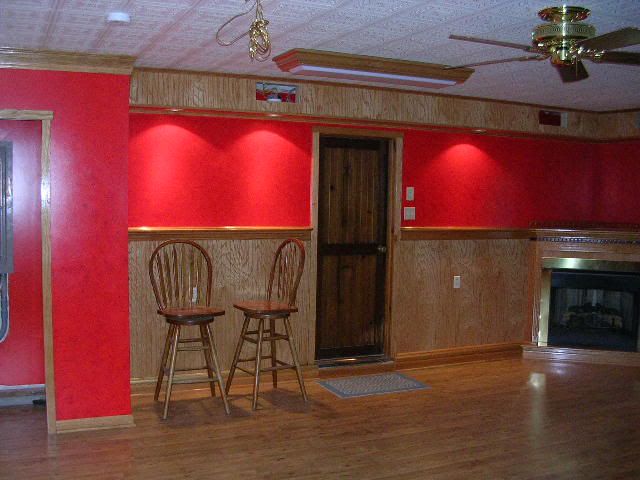
The pictures above and below are two of the completed cieling. You can also see that the lighting has been added, both the soffit cans and the florescent fixtures. The cieling fan is also in place. The crown moulding on the top of the bookcase really gives it a built in appearance.
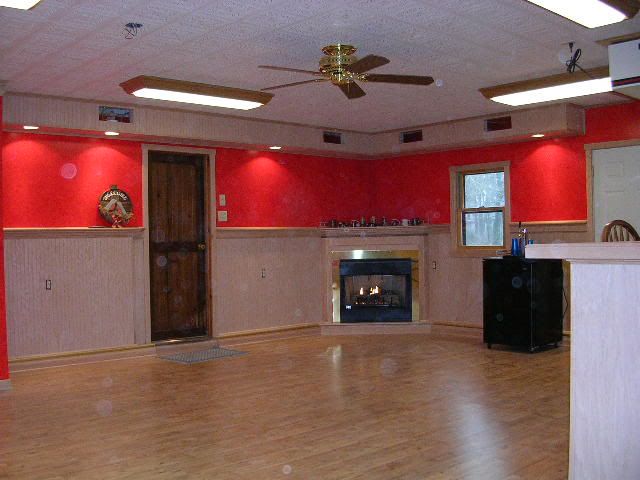
The photo below details the fireplace and its brass details. I included this picture though to show the five piece built up cap for the wainscoting. I really wish that I had taken a close up photo of it since it really added to the look of the room. I was going to go with a simple store bought one piece cap. I am so glad that I fabricated the five piece cap. It really adds to the look of the room. It made for a lot more work as I estimate that it added a few hundred more feet of trim work. By the way, I ended up buying a pneumatic nailing set up for the job since nailing by hand really would have sucked. The air compressor and nailing gun set up really sped up the trim installation!! BIG TIME!
I pre-fabbed much of the structural elements of the bar in the wood shop before moving to the bar room and putting it all together.
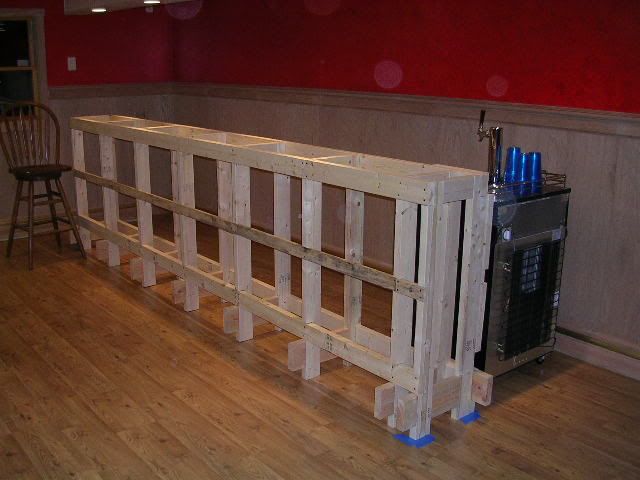
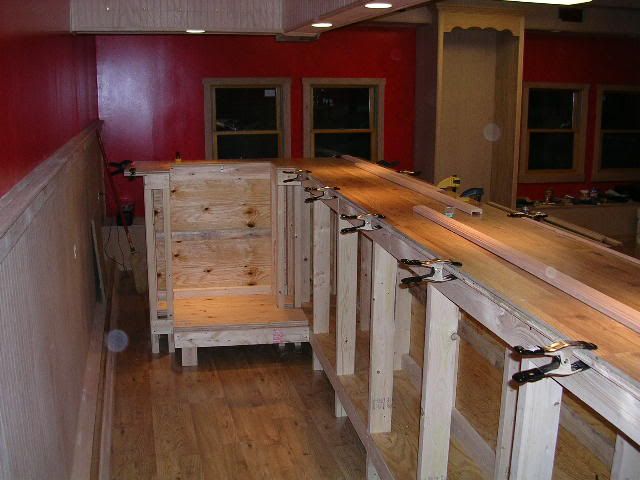
Below, the top, which was lelft over Pergo flooring, has been added to the bar and the plywood sub-face has been nailed on. The end unit to the bar has also been added. You can easily see where the Keg cooler will be located. The clamps are holding down the still wet glue under the Pergo bar top pieces. The straight pieces of wood on top of the bar are the oak edging that I fabricated in the shop.
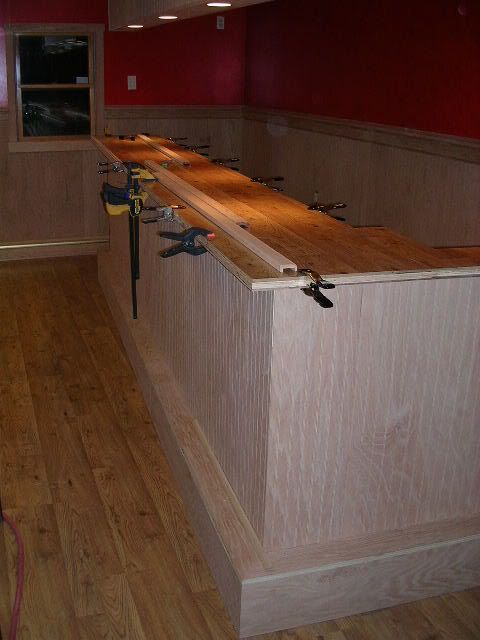
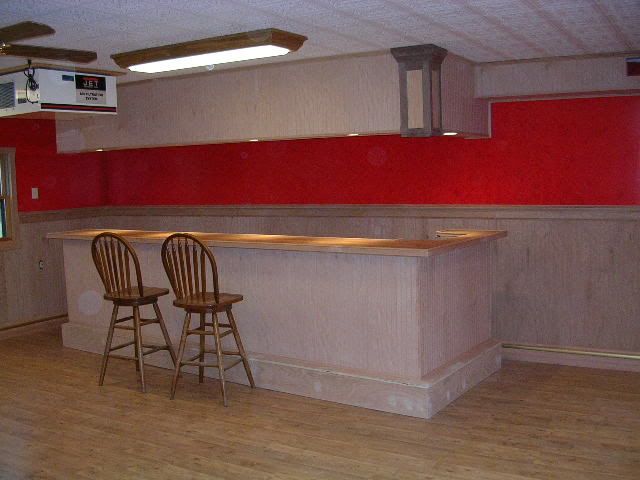
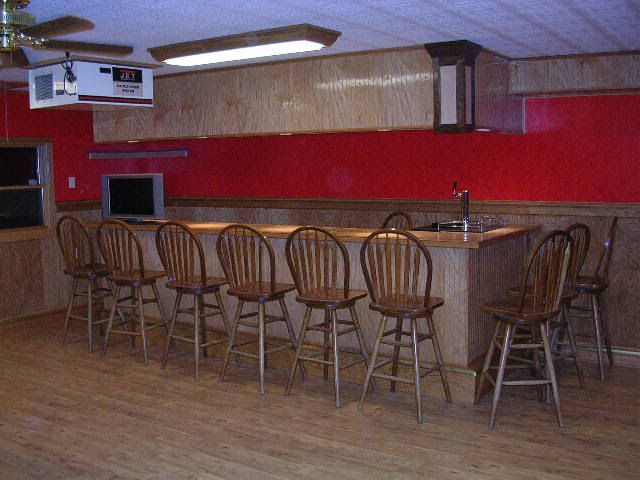
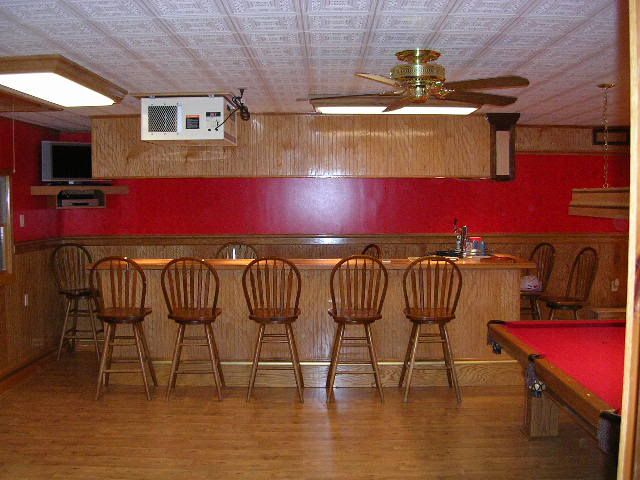
The bar below is almost finished. Yet to be added is the brass looking strip that will cover the corner of the foot rest. I wanted to apply the finish to the bar before adding this item. We put two of the bar stools in front of the bar to see how they would look. We got a bargain on a dozen of these stools when the Three Bridges Tavern closed up and was selling all of their inventory. We got these stools - high backed and swiveled - for basically twenty bucks apiece! They sell for something like $80 per.
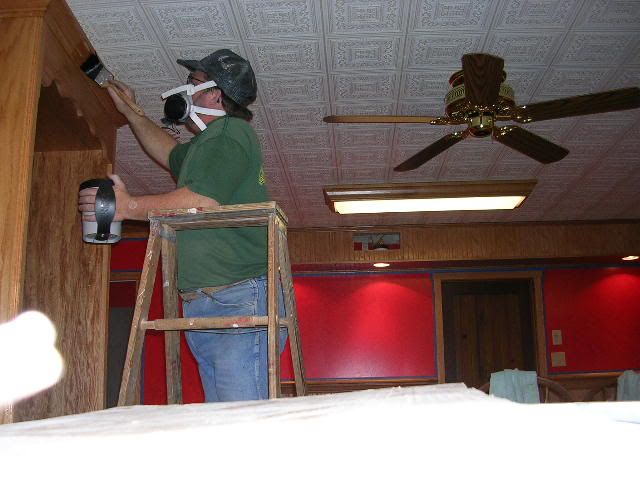
Applying the finish was a toxic adventure. I used a product called Waterlox on advice from a few woodworkers. It provides a very durable finish and it was what I needed for the bar particularly, but I used it completely for all of the oak in the room. It was a slow drying finish and had a high concentration of fumes. Thus, you can see that I needed to use respiratory protection.
The picture below gives a good shot of the hue that the clear Waterlox finish gave to the oak.
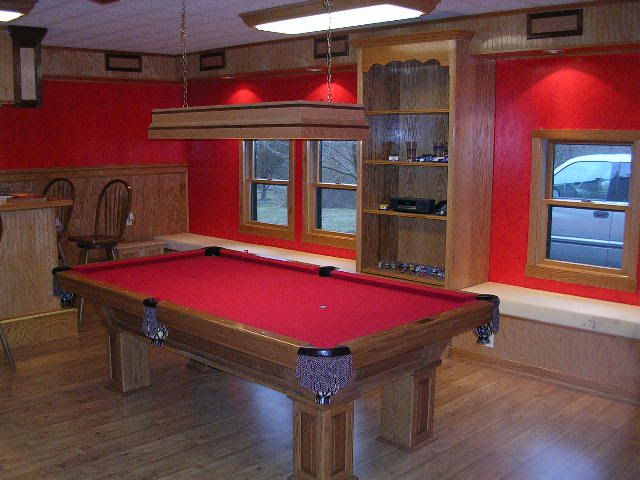
Another shot of all of the oak and the way the finish deepened the appearance. I had already mounted the pool table light mounting points and that is the chain hanging from the cieling in the top of the photo.
As it turned out, the color of the oak bar stools were a damned fine match for the oak in the room.
I had fabricated the oak with walnut inlay pool table light way ahead of time and lived to regret it as it was constantly in the way in the shop. I was a happy camper when I finally got to hang it and have it out of my hair.

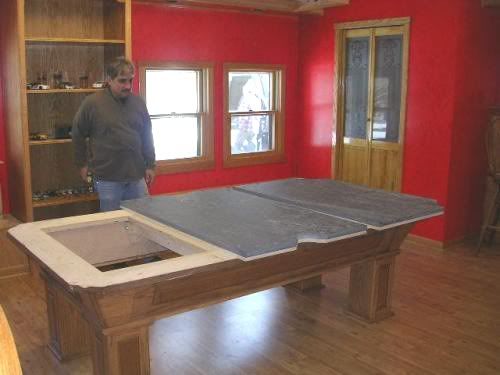
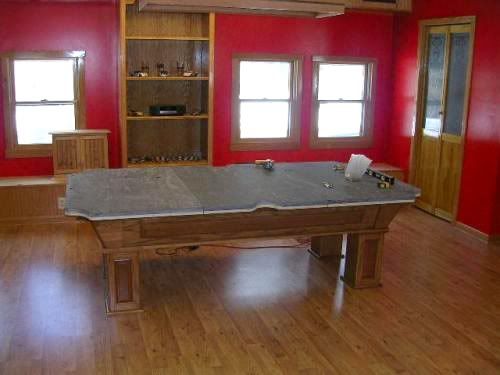
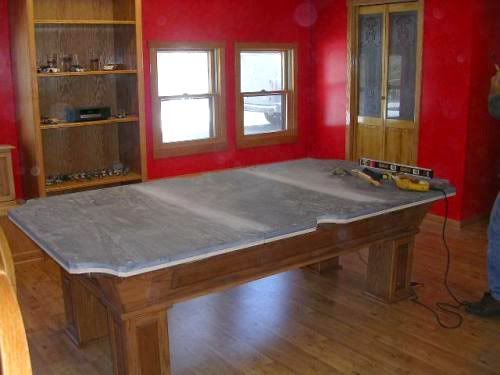
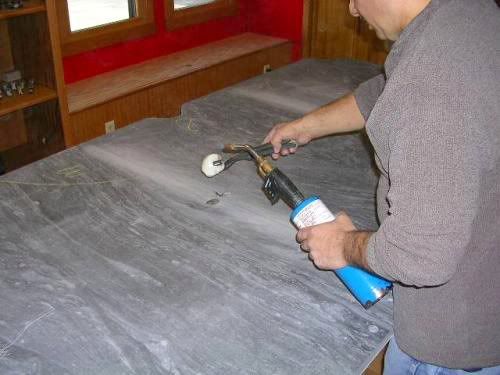
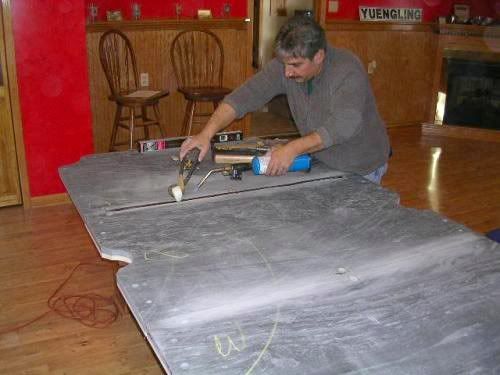
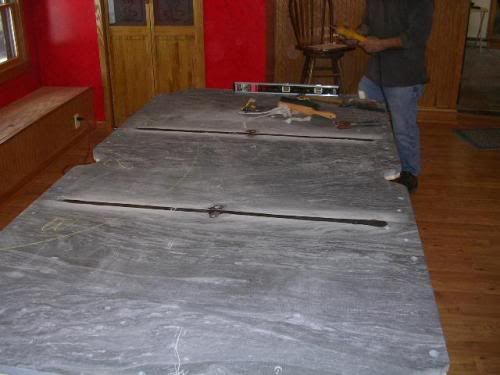
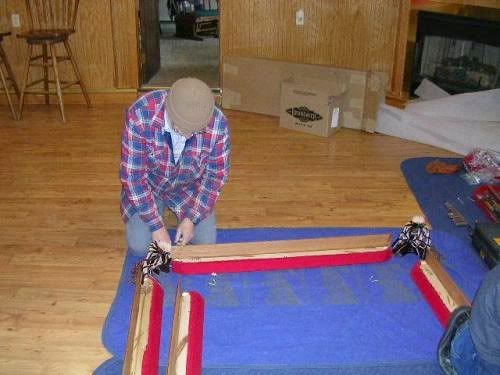
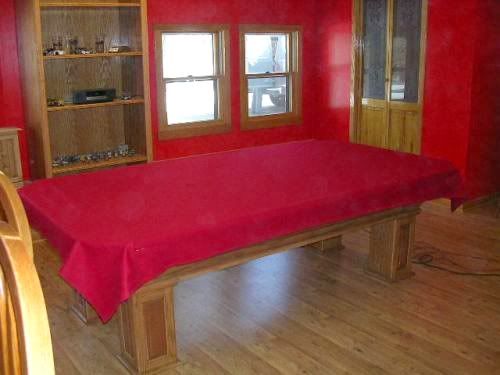
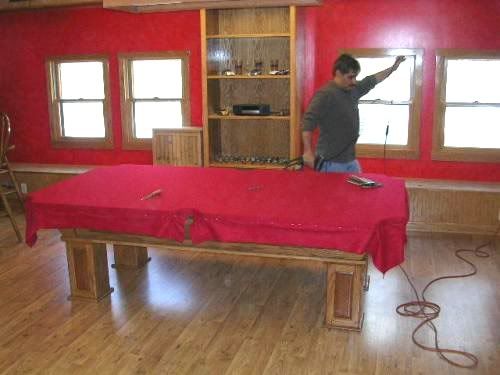
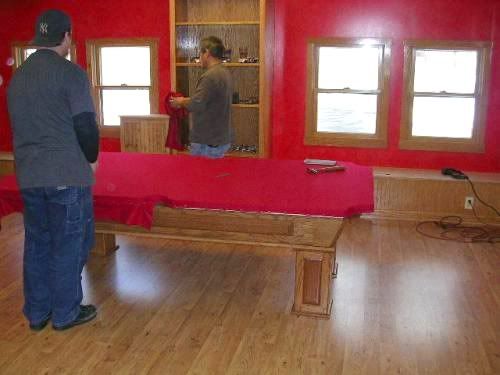
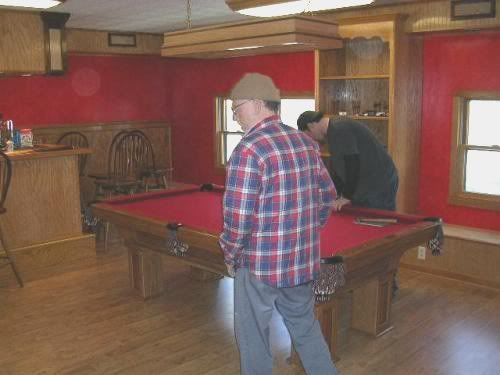
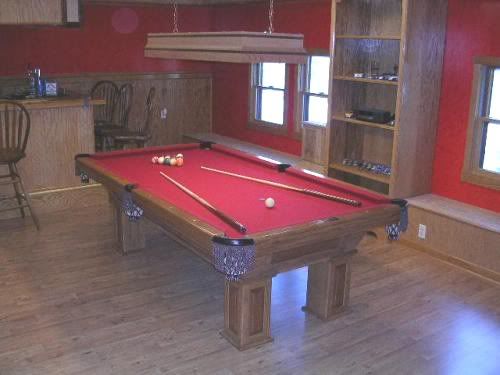
The bar is ready for customers (freinds) and the pool table has been delivered (below).
The soffit access holes have been covered by flat panel oak and walnut covers.
This project has been a blast to do. It was certainly a ton of work. Don't know if I want to do something of this magnitude for quite a while. I still need to build an oak poker table which will be located right in front of the fireplace. I also need to build a number of picture frames for a bunch of racing related lithographs. I bought the window seating foam the other day and I will be sewing up fabric covers for them soon. That's right, I will be manning the sewing machine. I've done it before with a window seat cushion that is located in our guest bedroom upstairs. Not so hard. Anyway, I hope you've enjoyed this little trip through the contruction process of the bar room. Though, these pictures can't begin to actually demonstrate the true amount of work and planning that was involved.
posted by Fred @ 5:50 PM
1 comments
![]()