

Jim and Mari's Pirates Treasure Chest
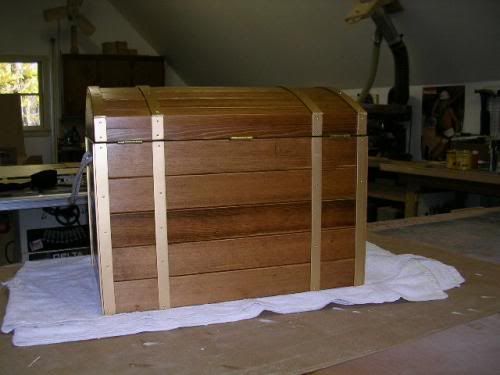
Wrapped up this little project today and am pretty happy with it. Our son and his fiancé asked me to build them a pirate’s treasure chest for their wedding (next Summer) reception for the guest to deposit their gift/money cards into as they enter the reception hall. They had no real specifications other than wanting it to be 19” wide by 13” deep and 15” tall. “Whatever you make will be fine with us.” I was told, so the imagination was cranked up.
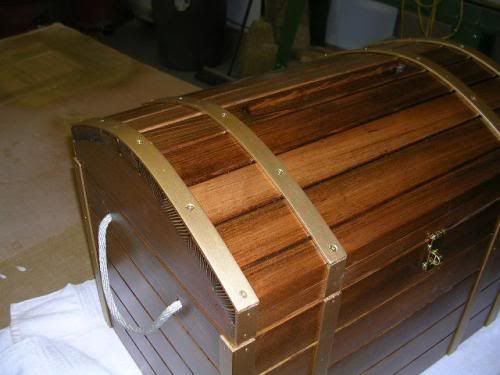
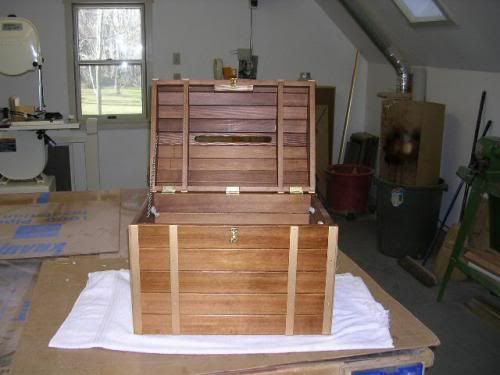
I used #1 grade cedar with my original thinking of finishing it with a clear finish. Some testing of some of the cutoff scrap found that I didn’t like the look and besides, in the meantime, they told me they wanted it to have a dark finish. I opted for a multiple board look instead of solid sides and connected the pieces with glue and #10 biscuits. The lid is based on a framework subassembly and once I had that, it was easy to figure out how wide to make the nine slats so that they sat relatively flat on the curved framework. Two interior cross members were added inside the lid to help with lateral strength of the lid slats. All slats are glued and braded to the framework with the exception of the slotted one at top dead center which will be replaced with a solid piece once the wedding is over for future use by the married couple.
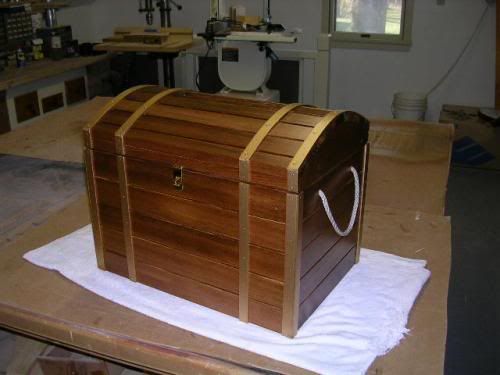
Used English chestnut stain and shot it with four or five coats of satin lacquer due to their not wanting it to be to “shiny”. They wanted it looking like it was an old piece. The simulated steel strapping on the exterior of the box is pine strips planed down to 1/8”, primed and painted gold to match the hardware and braded to the sides of the box with some brass plated round head pins that kind of simulate carriage bolt heads which could have been used on an actual treasure chest. On the lid, the strapping is screwed into place on alternate slats for further strength with the curvature of the lid in mind. There are pre-drilled holes on alternate slats for the same pins as on the side, but need to be inserted after the top slotted slat is replaced.
Three Stanley utility hinges swing the lid and a brass hasp assembly locks the front of the chest. Interesting that the screw leaf of the hasp, which is usually hidden behind its adjacent slotted leaf, was milled to be exposed on the front of the box, defeating its “locking” ability. I circumvented this problem by attaching the screw leaf on the inside lip of the tops front edge. Rope handles and an interior chain to keep the lid from hinging all the way back complete the project.
posted by Fred @ 12:06 PM
![]()
3 Comments:
Read the Wedding Pirate's Treasure Chest description. Ahh, the pictures are great, nice job! You certainly have a knack for wood working/cabinetmaking. This heirloom piece will be the talk of the reception. Love it!
Carol & Walt Snyder
An incredible piece! Congrats!
How much would a piece just like this cost? I'm interested in something just like this to make it my son's toy box.
Post a Comment
<< Home